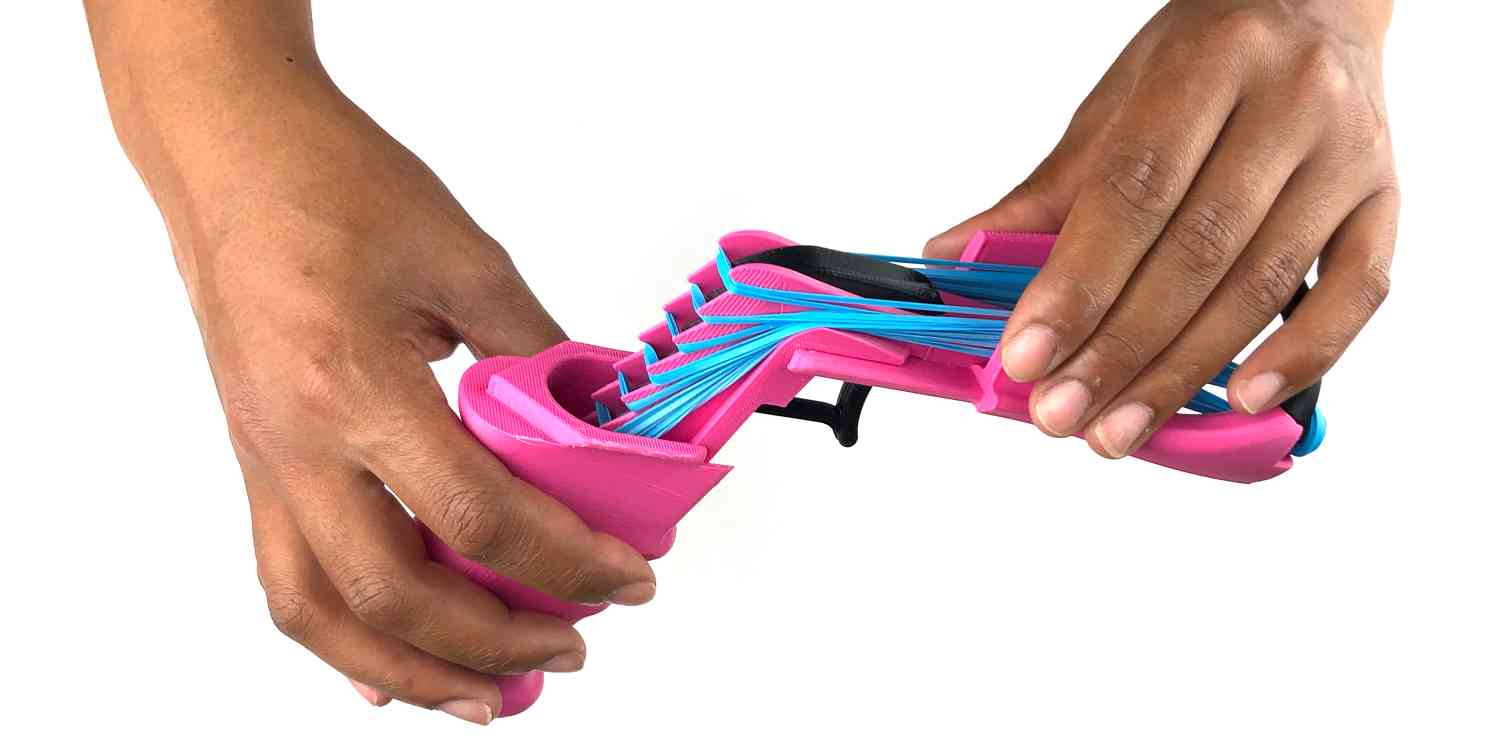
Please read through this beautifully illustrated user manual to ensure that you are getting the most out of your new toy!
Looking for the product page? We've got you covered:
1. Please Read This
The Snapper 2.0 is not a joke. Terrible Toyshop assumes no liability for how you choose to use this toy. Please practice risk-aware and consensual kink (RACK). Always establish explicit consent before you engage in impact play, especially if you are using a toy for the first time (or for the first time with a particular partner). Test the Snapper 2.0 on an inanimate object before you use it on yourself or another person. Learn about and assess the risks, and negotiate informed consent if you plan to use the toy with a partner.
The Snapper 2.0 can cause permanent physical harm if it is not used responsibly. Never allow the barrel to point at (or shoot rubber bands at) sensitive tissue, especially if the toy is loaded with pony beads. Do not fire the toy at the head, the neck, joints (including the spine), genitals, anywhere on the body where arteries or bones are near the surface of the skin (such as the inside of elbows or knees, shins, fingers, wrists and tailbone), or anywhere else that may experience permanent damage due to a concentrated and forceful impact. If you’re not sure about the safety of something you want to try, do your own research and/or seek advice from someone who is knowledgable about impact play safety. Manage the dangers according to your and your partners’ personal risk tolerance.
2. Anatomy of the Snapper 2.0
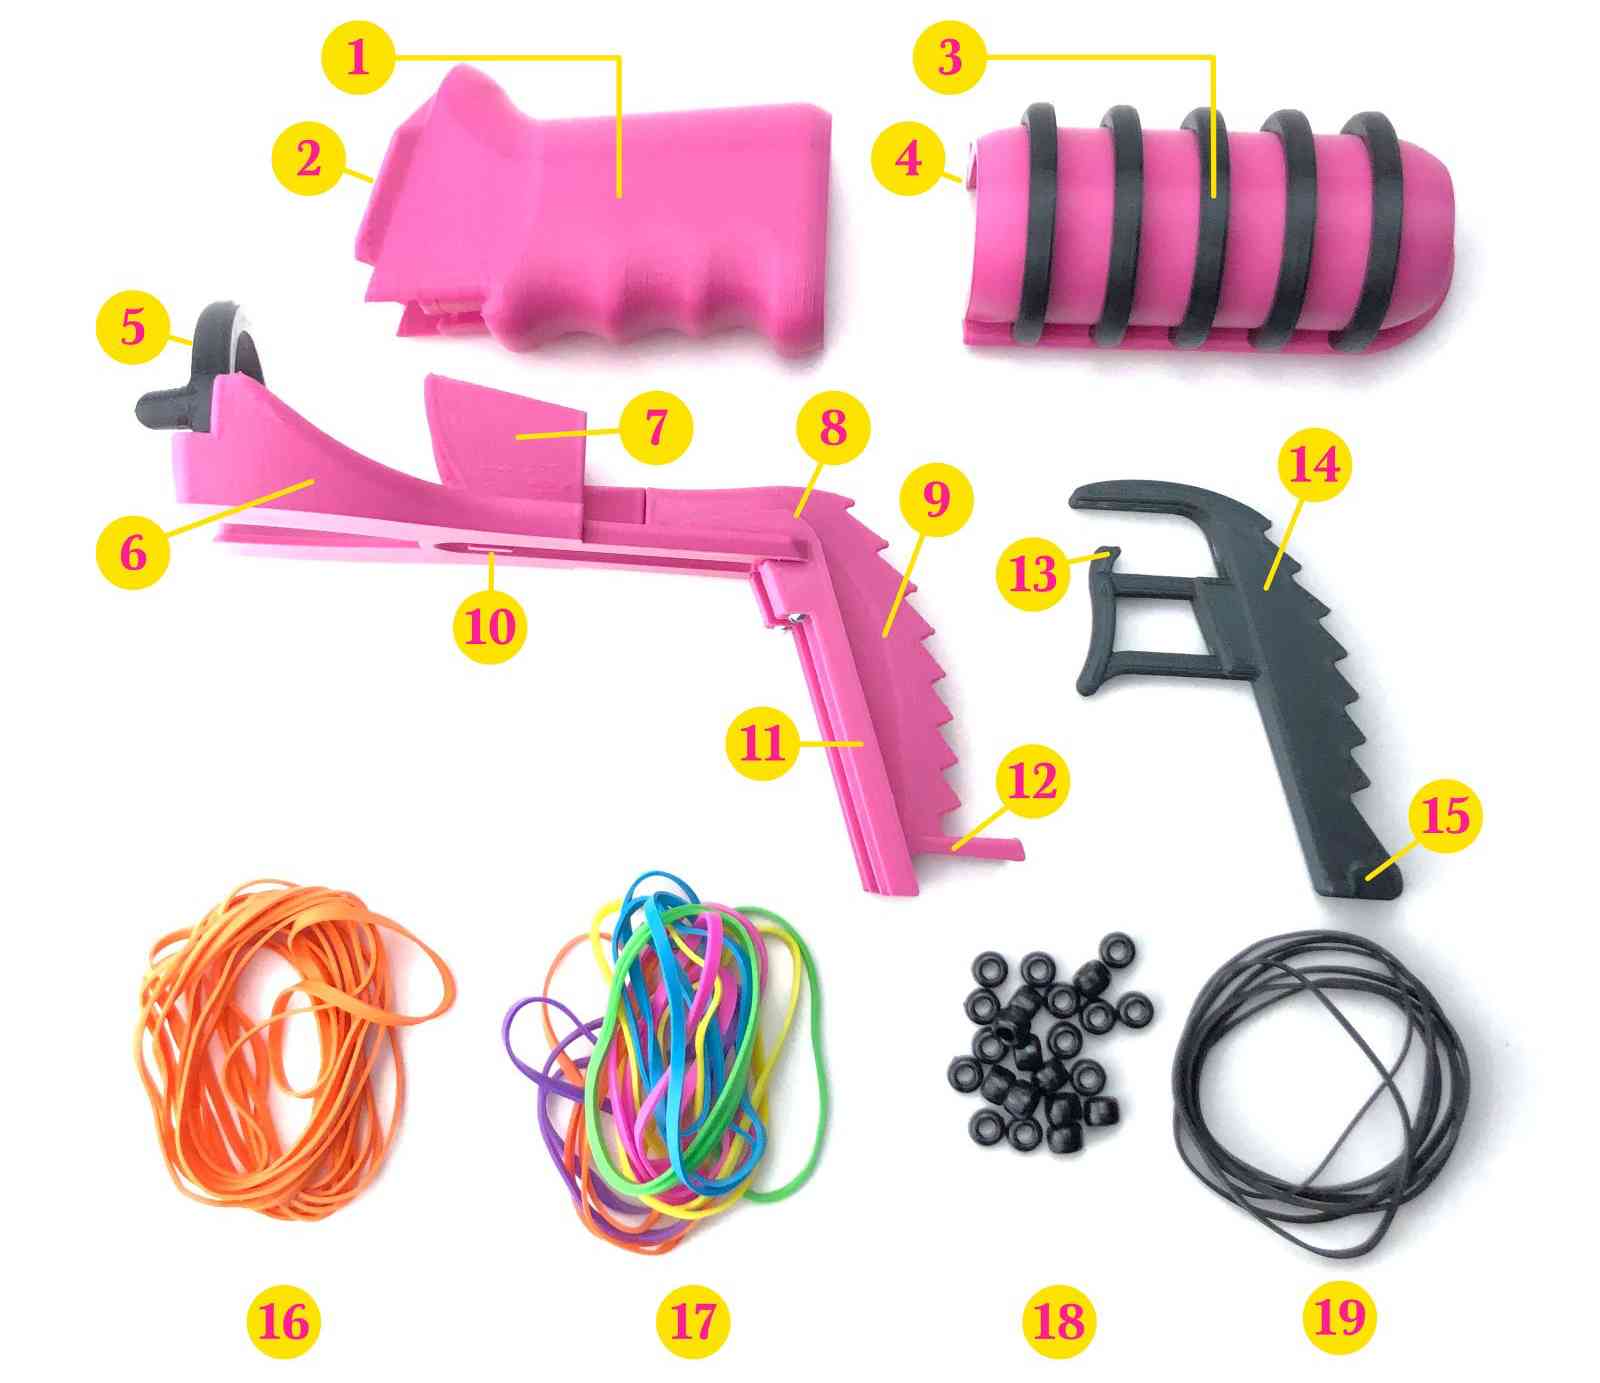
1. Grip
2. Wing
3. Slide
4. Slide track
5. Muzzle
6. Barrel
7. Fins
8. Pivot point
9. Magazine
10. Barrel hook
11. Magazine track
12. Trigger guide
13. Trigger return hook
14. Trigger assembly
15. Trigger guide flange
16. Latex-free rubber bands
17. Multicoloured rubber bands
18. 9mm Pony Beads
19. Trigger return rubber bands
3. Removing the Slide
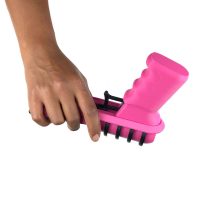
3.1 Hold the bottom of the barrel securely with the grip pointing up.
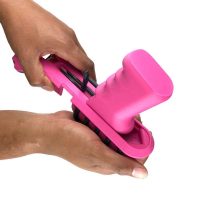
3.2 Gently grip the top of the slide and slide it off in a smooth and deliberate motion.
Pro tip: The catches that make the slide stay in place are on the inside of the tracks – avoid squeezing the slide from the sides when you are removing it.
4. Loading Procedure
The design of the Snapper 2.0 is optimized for impact play. As a result, it has a slightly unusual loading procedure compared with a typical rubber band gun. Though it may seem a little awkward at first, this procedure gets much easier after you’ve gone through the process of loading it a few times.
Load the Snapper 2.0 immediately before use. Leaving the toy loaded for an extended period of time will cause the rubber bands to lose elasticity and break.
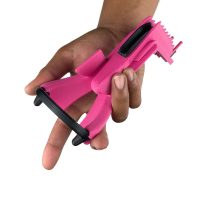
4.1 Grip the barrel with your index finger free to move through the Y-shaped opening.
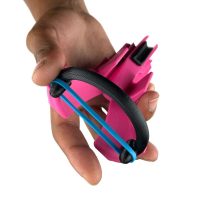
4.2 Place an elastic band over the pin on each side of the muzzle.
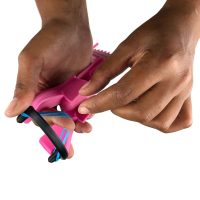
4.3 Use your free index finger to draw the elastic band through the muzzle and pass it to your other hand.
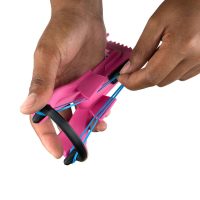
4.4 Draw the elastic band between the fins.
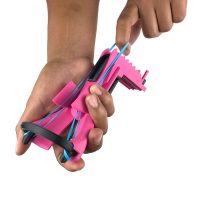
4.5 Thread the elastic band over the pivot points at the top of the magazine.
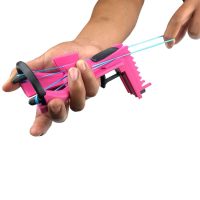
4.6 Before you pivot the elastic band down onto the magazine, stretch it out to the full length it needs to reach the next available pair of teeth.
Pro tip: Stretching the elastic band before you pivot will stretch the band evenly along its length. This will extend the life of your elastic bands and make the toy easier to load.
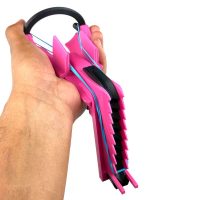
4.7 Load the magazine starting from the bottom tooth and work your way up. The first elastic band you load will be the last one you fire.
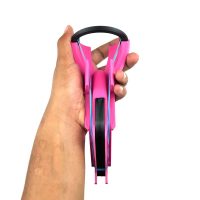
4.8 Once each rubber band is loaded, double check your work and then repeat from step 2.2 until the magazine is fully loaded.
Pro tip: Always double check that the elastic band you just loaded is correctly threaded between the fins and over the pivot points. It is super annoying when you have to unload and reload the whole magazine to access and fix a mistake.
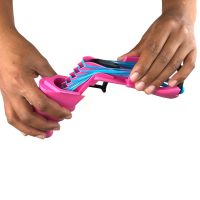
4.9 When all of the rubber bands are loaded, slide the magazine into the grip.
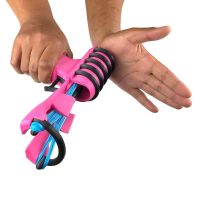
4.10 Align the tracks on the slide with the wings on the grip. Gently advance the slide forward until the front of the slide track is seated on the sides of the barrel.
Hold the grip with your index finger below the trigger (as pictured) to avoid pinching the hand that is holding the toy. Use the palm of your other hand to push the slide into its locked position.
5. Using Pony Beads
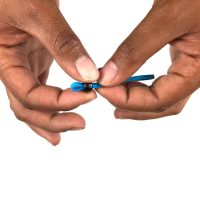
5.1 Pinch the end of the elastic and feed it through the bead.
When you load the toy, the bead should be in the centre of the elastic band (i.e., centred between the pins on the muzzle) when you start the loading procedure at step 2.2.
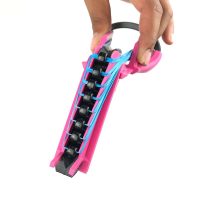
5.2 The pony beads should look like this when the magazine is fully loaded.
6. Replacing the Trigger Return Elastic Band
The trigger on the Snapper 2.0 needs fair amount of force to return it to its starting position smoothly. If you notice that the trigger is not returning smoothly after each shot, the first thing you should try is replacing the trigger return elastic band. Here’s how!
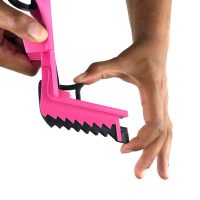
6.1 Fully depress the trigger with your thumb and place your forefinger on the bottom of the trigger assembly.
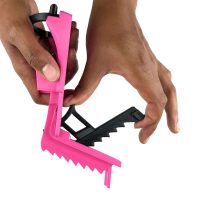
6.2 Keeping the trigger fully depressed with your thumb, use your forefinger to pivot the entire trigger assembly around the trigger return hook. You can then slide the entire trigger assembly toward the bottom of the magazine to release it.
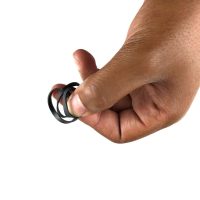
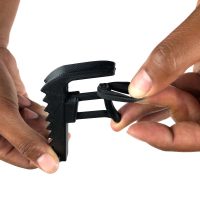
6.4 Hook the new elastic band onto the trigger return hook.
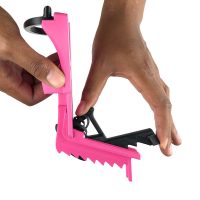
6.5 Use the trigger return hook as a pivot point to reinstall the trigger into the magazine.
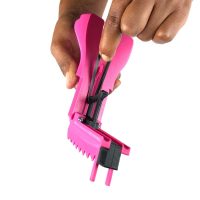
6.6 Attach the trigger return elastic band onto the barrel hook.
